

Have you ever wondered how to grow your own juicy, sweet cantaloupes right in your backyard? Picture this: You’re craving a refreshing slice of this delicious fruit on a hot summer day, but you realize you’re out of fresh cantaloupes. What if you could easily propagate cantaloupe seeds at home and enjoy an endless supply of these tasty treats?
Key Takeaways
- Select ripe and healthy cantaloupes to extract seeds for propagation.
- Propagate cantaloupe seeds in the spring when soil temperature is around 70°F (21°C) or higher for optimal germination.
- Pre-treat cantaloupe seeds by soaking them in warm water before planting to enhance germination rates.
- Use indoor sowing techniques with containers and quality seed-starting mix, or outdoor sowing in well-draining soil for successful propagation.
- Provide ideal conditions for seed germination such as consistent warmth, slightly moist soil, and sufficient sunlight.
- Transplant cantaloupe seedlings carefully into sunny locations with well-draining soil after they have developed true leaves.
Understanding Cantaloupe Propagation
When it comes to understanding cantaloupe propagation, there are a few key points to keep in mind. Here’s what you need to know:
The Basics of Cantaloupe Seed Propagation
To propagate cantaloupe seeds successfully, start by selecting ripe and healthy cantaloupes. Scoop out the seeds from the fruit and wash them thoroughly to remove any pulp or debris. Next, allow the seeds to dry completely on a paper towel for a few days. Once dry, store them in a cool, dry place until you’re ready to plant.
Best Time to Start Propagation
The best time to start propagating cantaloupe seeds is in the spring when the soil temperature reaches around 70°F (21°C) or higher. This ensures optimal conditions for germination and growth. By planting your seeds at the right time, you give your cantaloupe plants the best chance of thriving and producing delicious fruit for you to enjoy.
Preparing for Propagation
When it comes to propagating cantaloupe seeds, proper preparation is key to ensuring successful growth. Here’s what you need to do before starting the propagation process:
Recommended Products
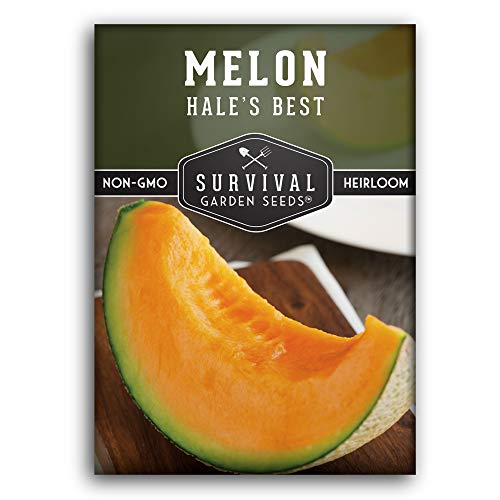
HEIRLOOM CANTALOUPE SEEDS – Enjoy classic homegrown flavor with sweet, juicy orange flesh and a small seed cavity for plenty of delicious fruit in every harvest from this beloved heirloom cantaloupe

Beautiful - Large individual packets of Honey Rock, Hales Best and Honeydew Melon (Cucumis melo) seeds. Grow an abundant harvest of colorful cantaloupes. Enjoy these delectable musk melons picked straight from your garden.

Name: Hales Best Jumbo Melon | Type: Heirloom
Collecting Cantaloupe Seeds
To begin the propagation journey, start by collecting ripe cantaloupes from which you’ll extract the seeds. Remember to select fully ripened fruits as they contain mature seeds that are more likely to germinate successfully. Once you have your ripe cantaloupes, scoop out the seeds and separate them from the flesh using a spoon.
Pre-Treatment Requirements
Before planting the cantaloupe seeds, it’s essential to subject them to pre-treatment measures that can enhance germination rates. One common pre-treatment method is soaking the seeds in warm water for a few hours or overnight. This process helps soften the seed coat, promoting quicker germination once planted in soil.
By following these steps and preparing your cantaloupe seeds adequately, you set a solid foundation for successful propagation and eventual growth of delicious cantaloupes in your own garden.
Sowing Cantaloupe Seeds
When it comes to sowing cantaloupe seeds, you have two primary techniques: indoor and outdoor. Each method has its advantages and considerations that can impact the success of your cantaloupe cultivation.
Recommended Products

NUTRIENT-RICH, NATURAL, AND ORGANIC SOIL: Grow a bountiful garden in your home with the Back to the Roots All-Purpose Natural and Organic Peat-Free 3-in-1 Seed Starting Mix, packed with the nutrients needed for your plants, flowers, and vegetables to thrive

Includes Back to the Roots Compressed Seed Starting Potting Mix that expands to 12qt of soil. A balanced pH, which means it’s truly all-purpose. Use alone or as an amendment for anything in a pot or in the ground — vegetables, flowers, herbs, and even starting seeds.

EASIER SEED STARTING: Our Burpee SuperSeed tray with 8 extra-large flexible pop-out cells is designed to simplify indoor seed starting. Just add seed starting mix, seeds, water and light to get growing! Perfectly sized for starting seeds in the windowsill: 11.5" x 5-3/16" x 2-1/4". Rows are labeled alphanumerically for seedling identification with included Plant-o-Gram diagram.
Indoor Sowing Technique
For indoor sowing, you’ll need containers like seed trays or peat pots, a quality seed-starting mix, water, and a warm location with plenty of light. Here’s how to sow cantaloupe seeds indoors:
- Prepare Containers: Fill your containers with a moistened seed-starting mix, leaving about half an inch of space at the top.
- Planting Seeds: Make small holes in the soil (about 1 inch deep) using your finger or a pencil. Drop one or two cantaloupe seeds into each hole.
- Cover and Water: Gently cover the seeds with soil and water them lightly. Ensure the soil remains consistently moist but not waterlogged.
- Provide Light and Warmth: Place your containers in a warm spot where they can receive ample sunlight or use grow lights if natural light is limited.
- Monitor Growth: Keep an eye on the moisture levels, ensuring the soil doesn’t dry out. Once your seedlings have developed true leaves, they are ready for transplanting outdoors.
Outdoor Sowing Technique
If you prefer sowing directly in your garden, follow these steps for successful outdoor cantaloupe seed propagation:
- Selecting Planting Location: Choose a sunny area with well-draining soil for optimal growth.
- Soil Preparation: Prepare the soil by loosening it to a depth of about 12 inches and incorporating compost for added nutrients.
- Sowing Seeds: Plant your cantaloupe seeds about 1 inch deep in groups of 2-3 seeds, spacing each group around 24 inches apart to allow room for vine spread.
- Watering Regimen: Keep the soil consistently moist but avoid overwatering to prevent rotting of seeds or young plants.
- Thinning Seedlings (if needed): Once your seedlings have grown their first true leaves, thin them out to leave only the healthiest plant in each group.
Care During Germination
When it comes to the germination stage of propagating cantaloupe seeds, there are specific factors you should pay attention to for successful growth. Here’s what you need to know:
Ideal Conditions for Seed Germination
To ensure your cantaloupe seeds sprout effectively, provide them with the following optimal conditions:
- Temperature: Keep the soil consistently warm at around 70-90°F (21-32°C) as cooler temperatures can delay or inhibit germination.
- Moisture: Maintain slightly moist but not waterlogged soil during germination. Overwatering can lead to rotting of seeds before they even have a chance to sprout.
- Light: While light isn’t necessary for seed germination, once seedlings emerge, they require plenty of sunlight for healthy growth.
Managing Moisture and Temperature
Properly managing moisture and temperature levels is crucial during the germination phase:
- Watering: Water the soil gently and regularly to keep it evenly moist. Avoid creating waterlogged conditions that can drown the seeds.
- Covering Soil: Consider covering the sown area with a plastic wrap or a humidity dome to retain moisture until seeds sprout.
- Heat Source: If needed, use a heat mat specifically designed for seed starting to maintain consistent warmth for optimal germination.
By providing these ideal conditions and carefully managing moisture and temperature, you’ll set the stage for successful cantaloupe seed germination.
Transplanting Seedlings
When and How to Transplant
It’s essential to transplant your cantaloupe seedlings at the right time to ensure their successful growth. Wait until the seedlings have at least two sets of true leaves before transplanting them into your garden or larger containers. This usually occurs when the seedlings are around 3-4 weeks old.
To transplant your cantaloupe seedlings, follow these steps:
- Prepare the Planting Site: Choose a sunny location with well-draining soil for optimal growth.
- Dig Holes: Dig holes in the soil that are slightly larger than the root ball of each seedling.
- Transplant Carefully: Gently remove each seedling from its container, being careful not to damage the roots.
- Plant Seedlings: Place each seedling in a hole and cover its roots with soil, pressing gently to secure it in place.
- Water Thoroughly: Water the newly transplanted seedlings immediately after planting to help them settle into their new environment.
Acclimatizing Seedlings to Outdoor Conditions
Before moving your cantaloupe seedlings outdoors permanently, they need to be acclimatized gradually to prevent shock and ensure their survival in outdoor conditions.
Here’s how you can acclimatize your cantaloupe seedlings:
- Start Slowly: Begin by placing your seedlings outdoors in a sheltered spot for a few hours each day, gradually increasing exposure over 7-10 days.
- Monitor Weather Conditions: Pay attention to weather forecasts and avoid exposing your seedlings to extreme temperatures or harsh winds during this period.
- Protect from Direct Sunlight: Shield young plants from direct sunlight initially by placing them in partially shaded areas before transitioning them to full sun exposure.
- Maintain Adequate Moisture: Ensure that the soil remains consistently moist but not waterlogged during this transition period.
By following these steps, you’ll help your cantaloupe seedlings adapt smoothly to their new outdoor environment and thrive in your garden.
Recommended Products

Indoor Garden Seed Starter Trays: Kickstart your indoor garden effortlessly with our thoughtfully designed seedling start trays. Each cell measures 1.6 inches in width, 1.6 inches in length, and 2 inches in depth, offering the perfect size for a wide array of seeds, including herbs, microgreens, succulents, tomatoes, roses, vegetables, and more.

Pro Grow Lights with Advanced Chips: Equipped with 56 high-efficiency beads per tray, these LED strips simulate natural sunlight for optimal seedling growth. Adjustable brightness and timer functions let you customize lighting for every plant stage, promoting faster, healthier growth—perfect for herbs, flowers, and more

[Value Seedling Starter Kits]: It includes:6*12 cells seedling trays and 6 grow lights. Which can provide lights and heat to the seedlings. There are 3 lights: white light, blue light, red light. It is suitable for starting seedlings that love lights. Such as: basil, rosemary, mint, herds, tomatoes, pepper shoots, strawberries, etc.
Conclusion
Growing cantaloupes from seeds can be a rewarding experience. By following the steps outlined in this article, you can start your own journey to cultivating delicious melons in your garden. Remember to choose ripe fruits, properly clean and store the seeds, and provide the ideal conditions for germination. Whether you decide to sow the seeds indoors or outdoors, nurturing the seedlings with care is crucial for their successful growth. Transplanting them at the right time and acclimatizing them gradually will help ensure that your cantaloupe plants thrive and yield sweet fruit that you can enjoy all summer long. Happy gardening!
Frequently Asked Questions
Q: What is the best time to start cantaloupe seed propagation?
A: The best time to start cantaloupe seed propagation is in spring when temperatures are consistently warm.
Q: How should I store cantaloupe seeds before planting?
A: Store cantaloupe seeds in a cool, dry place away from direct sunlight in an airtight container for best results.
Q: When should I transplant cantaloupe seedlings into the garden?
A: Transplant cantaloupe seedlings into the garden after the last frost date and when they have developed their true leaves.
Q: How do I acclimatize cantaloupe seedlings to outdoor conditions?
A: Acclimatize cantaloupe seedlings gradually by exposing them to outdoor conditions for increasing periods over several days.
