
Ever found yourself struggling with a tangled mess of rope while trying to trim those hard-to-reach branches? Picture this: you’re all set to tackle your pruning tasks, but the rope on your tree pruner has other plans, leaving you in a frustrating predicament. How can you efficiently retie the rope and get back to your gardening adventures without the hassle? That’s where this article comes in to save the day!
Assessing the Condition of the Rope
When evaluating the rope on your tree pruner, consider the following factors:
- Check for Wear and Tear: Look for fraying, cuts, or any signs of damage.
- Test the Strength: Ensure the rope can support the weight of the pruner.
- Inspect Knots: Examine the current knots for looseness or instability.
- Note the Length: Make sure the rope is of sufficient length for your needs.
Remember, a well-maintained rope is essential for smooth pruning.
Removing the Old Knot
When Removing the Old Knot on your tree pruner’s rope, start by carefully examining the knot. Look for any twists, tangles, or tight spots that could be causing issues. Use your fingers to gently loosen the knot until it’s easy to untie.
Next, trace the rope carefully to ensure you’re undoing the correct knot. Take your time to avoid creating more tangles in the process. Once you’ve identified the knot, hold the rope firmly and begin to untie it slowly.
If the knot is too tight to undo by hand, try using a small tool like a screwdriver or a pair of pliers to help loosen it. Be cautious not to damage the rope while doing this. Gently wiggle the tool to create space and make it easier to untie the knot.
After successfully removing the old knot, inspect the rope for any signs of wear or damage. Check for fraying, cuts, or weak spots that could compromise the rope’s integrity. Replace the rope if you notice any significant issues to ensure safe and efficient pruning.
Remember, patience is key when tackling knots on your tree pruner’s rope. Stay calm, take your time, and handle the rope gently to avoid creating additional tangles or damage.
Determining the Correct Length of Rope
To ensure a successful retying of the rope on your tree pruner, you’ll need the correct length of rope. Here are some steps to help you determine the exact measurement required:
- Measure the existing rope: Simply remove the old rope and lay it out in a straight line to measure its length.
- Add a few extra inches: It’s recommended to add a few extra inches to the measured length to accommodate for any extra slack or room for adjustments.
- Consider the pruner’s reach: Factor in the length needed based on how far you typically extend the pruner to reach the branches.
Once you have determined the correct length of rope needed, you’re one step closer to successfully retieing the rope on your tree pruner.
Tying a Secure Knot
When tying a secure knot for your tree pruner, choosing the right type of knot is essential. Opt for knots like the Figure-Eight Knot or the Bowline Knot known for their strength and reliability.
To start, position the rope correctly on your pruner by threading it through the designated hole or eyelet. Make sure the rope has enough length on both ends to create the knot securely.
Here’s a simple step-by-step guide to tying a secure knot:
- Create a loop with the rope.
- Pass the end of the rope through the loop.
- Wrap the end around the standing part of the rope.
- Pass the end back through the loop.
- Tighten the knot securely.
Remember to test the knot’s security by gently tugging on the rope to ensure it holds firmly in place.
For a visual guide or further clarification on knot tying, seek online tutorials or guides specific to tree pruners. These resources often offer step-by-step visuals to make the process more accessible.
Ensure that your knot is secure and tight before using your tree pruner to maintain safety and efficiency during pruning tasks.
Testing the Rope for Functionality
To ensure your safety and the effectiveness of your tree pruner, Testing the Rope for Functionality is crucial.
- Gently tug on the rope after tying the knot to check for any slippage or looseness.
- Look for any signs of wear or damage on the rope that could compromise its strength.
- Replace the rope if you notice any fraying, cuts, or weak spots to prevent accidents during use.
By regularly examining and testing the rope, you’ll maintain a reliable tool for your pruning tasks.
Recommended Products

High-quality PR-20 Tree Pruner rope: Measuring 20 feet long, this product is a sturdy tree pruner rope that is compatible with Jameson Fiskars pruners.
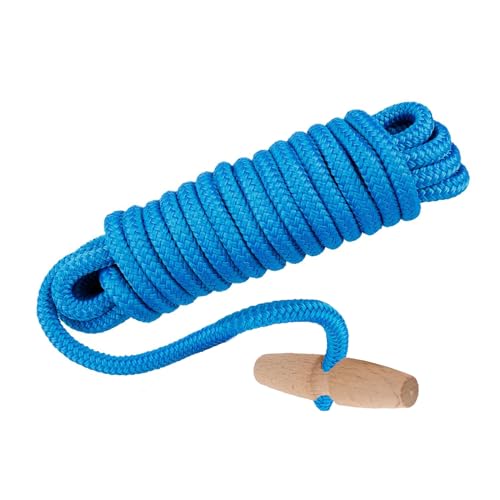
PR-20 Tree Pruner Rope Replacement, for Jameson Fiscar Big Mouth Manual Pole Saw & Tree Pruner,20 feet long with a 5/16 inch diameter(with Wooden Handle)

Pole saw rope: PR-20 This poly pruning rope measures 20 feet long with a 5/16-inch diameter, tree pruner replacement rope, Compatible with Jameson Fiskars pruner
Conclusion
Ensuring the rope on your tree pruner is secure and functional is key to safe and effective pruning. Remember to always test the knot and rope for any signs of wear or damage. Regular inspections and maintenance will help keep your tool reliable for all your pruning needs. Happy pruning!
Frequently Asked Questions
How should I test the rope after tying a secure knot for a tree pruner?
After tying a secure knot for a tree pruner, gently tug on the rope to check for slippage or looseness. Inspect the rope for signs of wear or damage, such as fraying or weak spots. If any issues are found, replace the rope to avoid accidents during use.
Why is it important to regularly check and test the rope for a tree pruner?
Regularly examining and testing the rope is crucial to ensure the tool’s reliability for pruning tasks. Checking for wear, damage, or weaknesses in the rope helps prevent accidents and ensures safe and effective use of the tree pruner.