
Do you dream of having your own fresh kiwis at home, but aren’t sure where to start? Picture this: you’re in your backyard, plucking ripe kiwis off the vine, knowing you grew them yourself. Exciting, isn’t it? In this article, you’ll discover simple yet effective tips on growing Jenny Kiwi plants.
Have you ever wondered how satisfying it would be to enjoy homegrown kiwis? Imagine the joy of sharing them with your loved ones or savoring them straight from your garden. This article will guide you through the process, making it easy for you to cultivate your own Jenny Kiwi plants.
Key Takeaways
- Select a planting site with ample sunlight exposure (6-8 hours daily) and well-draining, slightly acidic soil (pH 5.0-6.5) for Jenny Kiwi plants.
- Consider climate suitability (USDA hardiness zones 7-9), good air circulation, proper water drainage, and sturdy support structures for optimal growth.
- Follow specific steps for planting Jenny Kiwi, such as preparing a wide and deep hole, adding compost, planting at the right level, firming the soil, and installing support structures.
- Care for Jenny Kiwi plants by pruning regularly, providing sturdy support, maintaining moisture levels, fertilizing appropriately, managing pests and diseases, and harvesting at the right time for best results.
- Harvest Jenny Kiwi fruits when they are slightly soft, have the right skin color, and detach easily from the vine by twisting gently. Store them properly in cool, dark places and enjoy the fruits fresh or preserved in various dishes.
Selecting the Right Planting Site
When choosing the ideal location to plant your Jenny Kiwi, consider the following factors:
Recommended Products

Versatile Plant Support: This pothos plant climber support offers essential growth assistance for various climbing plants including vines, flowers, and vegetables; The indoor plant trellis features a modern honeycomb structure that complements home decor while providing functional climbing surfaces; Suitable for both indoor and outdoor gardening applications
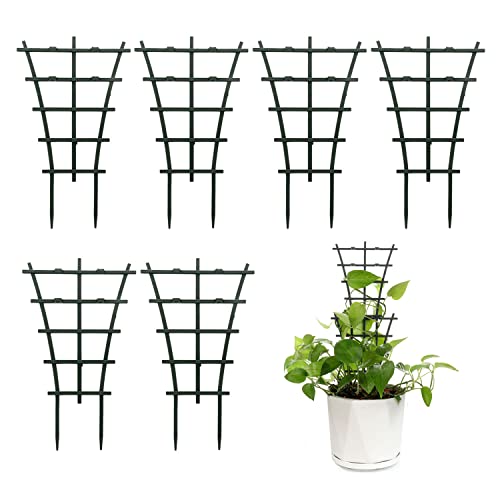
【Upgarded New Version】Our plant trellis is upgraded with high quality new material, increase the weight by 31%, reinforced to be more sturdier, providing stronger support for your potted plants
Sunlight Exposure
Ensure your Jenny Kiwi plant receives ample sunlight. Pick a spot in your garden that gets at least 6-8 hours of sunlight daily. Insufficient sunlight can hinder fruit production and growth.
Soil Quality
Opt for well-draining soil that is rich in nutrients. Jenny Kiwi plants thrive in slightly acidic soil with a pH level between 5.0 and 6.5. Conduct a soil test to determine the pH level and amend the soil if needed.
Climate Considerations
Jenny Kiwi plants prefer temperate climates. They grow best in USDA hardiness zones 7-9. If you live in a region with colder winters, consider planting your Jenny Kiwi near a south-facing wall for added protection against frost.
Air Circulation
Good air circulation helps prevent diseases in Jenny Kiwi plants. Avoid planting them in areas with stagnant air or where cold air settles. Choose a location with gentle breezes to ensure optimal airflow around the plant.
Water Drainage
Proper drainage is essential to prevent waterlogging, which can lead to root rot. Avoid planting your Jenny Kiwi in low-lying areas where water accumulates. If your soil has poor drainage, consider planting the kiwi in a raised bed or adding organic matter to improve soil structure.
Support Structure
Since Jenny Kiwi plants are climbers, they require a sturdy support structure to grow on. Install a trellis, arbor, or pergola near the planting site to provide support for the vine as it grows. Ensure the structure is secure and can bear the weight of mature vines laden with fruit.
By selecting the right planting site for your Jenny Kiwi, you can set the stage for a successful and fruitful harvest. Remember to consider sunlight, soil quality, climate, air circulation, water drainage, and support structure when choosing the perfect spot for your kiwi plant.
Planting Jenny Kiwi
When planting Jenny Kiwi, it’s important to follow specific steps to ensure your plants thrive and produce an abundant harvest. Here’s a guide to help you with the planting process:
Recommended Products

OUTDOOR POTTING SOIL: Miracle-Gro Organic Outdoor Potting Mix contains a quick-release natural plant fertilizer and also feeds plants for up to 2 months

Nutrient-Rich Organic Compost for Healthy Soil: Support stronger plant growth with this premium organic compost made from dairy cow manure. This all purpose soil amendment helps replenish essential nutrients often depleted after harvests, making it ideal for vegetable gardens, fruit trees, flowers, lawns and container plants.

OUTDOOR POTTING SOIL: Miracle-Gro Organic Outdoor Potting Mix contains a quick-release natural plant fertilizer and also feeds plants for up to 2 months
Selecting the Right Planting Site
Before you start planting Jenny Kiwi, assess your site to ensure it meets the plant’s requirements. Here’s what you need to consider:
- Look for a location that receives plenty of sunlight. Jenny Kiwi plants thrive in full sunlight, so choose a spot with direct sunlight exposure for the majority of the day.
- Ensure good air circulation around the plants to prevent diseases and promote healthy growth. Avoid planting Jenny Kiwi in low-lying areas where cold air can settle.
- Check the soil quality in the chosen area. Jenny Kiwi plants prefer well-draining, slightly acidic soil rich in organic matter. You can improve soil quality by adding compost or well-rotted manure.
- Consider the climate of your region. Jenny Kiwi plants generally prefer temperate climates, so ensure your area is suitable for growing kiwis.
- Proper water drainage is essential to prevent waterlogging, which can harm the plants. Avoid planting in areas prone to water accumulation.
Planting Process
Once you’ve chosen the right site, follow these steps to plant Jenny Kiwi:
- Prepare the Planting Hole: Dig a hole that is twice as wide and deep as the plant’s root ball. Loosen the soil at the sides and bottom of the hole to encourage root growth.
- Adding Compost: Mix some compost or organic matter with the soil you removed from the hole. This will enrich the soil and provide essential nutrients to the plant.
- Planting Jenny Kiwi: Gently remove the plant from its container and place it in the center of the hole. Ensure the top of the root ball is level with the ground surface.
- Backfilling: Fill the hole with the soil mixture, gently firming it around the base of the plant. Water the plant thoroughly after planting to help it settle and remove any air pockets in the soil.
- Support Structures: Install a sturdy trellis or support structure near the plant to provide support as it grows. Jenny Kiwi plants are vigorous climbers and need adequate support for their vines.
Caring for Jenny Kiwi Plants
To ensure your Jenny Kiwi plants flourish and yield a bountiful harvest, follow these care guidelines diligently.
Pruning Regularly
Trim your Jenny Kiwi plants regularly to promote growth and fruit production. Remove any damaged or dead branches to keep the plant healthy and vibrant.
Providing Proper Support
As vigorous climbers, Jenny Kiwi plants require sturdy support structures. Invest in quality trellises or fences to help them grow upwards and prevent sprawling.
Maintaining Moisture Levels
Keep the soil around your Jenny Kiwi plants consistently moist. Avoid waterlogging but ensure the roots receive adequate hydration, especially during dry periods.
Fertilizing Appropriately
Apply a balanced and specific kiwi plant fertilizer during the growing season to provide essential nutrients for healthy growth and fruit development.
Managing Pests and Diseases
Regularly inspect your Jenny Kiwi plants for signs of pests or diseases. Treat any infestations promptly to protect the plants and preserve fruit quality.
Harvesting at the Right Time
Harvest your Jenny Kiwis when they reach optimal ripeness. Waiting too long can affect taste and texture, so monitor your plants closely during the harvest season.
By following these care tips, you can nurture your Jenny Kiwi plants effectively and enjoy a successful harvest of delicious fruits.
Harvesting Jenny Kiwi Fruits
When it’s time to reap the rewards of your labor and enjoy the sweet fruits of your Jenny Kiwi plant, here’s what you need to know. Harvesting Jenny Kiwi fruits is a crucial step that determines the fruit’s flavor, quality, and overall success of your home cultivation.
Identifying Ripeness
To ensure you pick your fruits at the peak of perfection, you should look for certain indicators signaling that the Jenny Kiwis are ready for harvesting. The fruits should feel slightly soft when gently pressed, indicating they are ripe and ready to be picked. Additionally, the skin color should be a brownish-green or yellowish tint, depending on the variety, and the fruits should come off the vine easily when twisted gently.
Harvesting Technique
When harvesting Jenny Kiwi fruits, it’s essential to use the correct technique to avoid damaging the delicate skin and affecting the fruit quality. The best way to pick kiwis is by gently twisting them until they detach from the vine without any resistance. Be careful not to pull or tug on the fruits to prevent any damage.
Timing
The timing of harvesting Jenny Kiwi fruits is crucial for their flavor and sweetness. Typically, Jenny Kiwis are ready for picking in late fall or early winter, depending on your specific growing conditions. To enjoy the best taste, it’s recommended to harvest the fruits when they are fully ripe but still firm to the touch.
Storing the Harvest
After harvesting your Jenny Kiwi fruits, it’s important to store them properly to maintain their freshness and flavor. Keep the fruits in a cool, dark place with moderate humidity to prevent them from over-ripening. You can refrigerate the fruits for short-term storage or freeze them for longer durations to enjoy the delightful taste of homegrown kiwis throughout the year.
Enjoying the Fruits
Once you have harvested your Jenny Kiwi fruits and stored them appropriately, it’s time to savor the delicious flavors of your homegrown produce. Whether eaten fresh, added to fruit salads, or used in smoothies and desserts, Jenny Kiwis offer a burst of sweet and tangy taste that will delight your taste buds.
By following these harvesting guidelines, you can ensure a bountiful and flavorsome harvest of Jenny Kiwi fruits from your own backyard, making all your gardening efforts truly rewarding.
Conclusion
Growing Jenny Kiwi plants at home can be a fulfilling and rewarding experience. By following the detailed guidelines provided in this article, you can successfully cultivate your own fresh kiwis right in your backyard. From selecting the ideal planting site to harvesting the ripe fruits, each step plays a crucial role in ensuring a bountiful harvest. Remember to care for your plants diligently, paying attention to pruning, support, moisture levels, fertilizing, and pest management. With patience and dedication, you’ll soon be enjoying the delicious fruits of your labor. Happy gardening and may your Jenny Kiwi plants thrive abundantly!
Frequently Asked Questions
How do I choose the right planting site for Jenny Kiwi plants?
Select a site with full sun exposure, good drainage, and protection from strong winds to ensure optimal growth.
What are the key steps for planting Jenny Kiwi plants?
Prepare the soil with organic matter, plant the kiwi vines at the right depth, and provide adequate support for climbing.
How should I care for my Jenny Kiwi plants, including pruning?
Prune regularly to maintain shape, remove dead wood, and promote fruit-bearing spurs for a healthy plant.
How can I ensure proper moisture levels for my Jenny Kiwi plants?
Water deeply and regularly, especially during dry spells, to keep the roots moist but not waterlogged.
How do I fertilize my Jenny Kiwi plants for optimal growth?
Apply a balanced fertilizer in early spring and midsummer to provide essential nutrients for healthy plant development.
How can I manage pests and diseases affecting my Jenny Kiwi plants?
Monitor for common pests like mites and scale insects, and promptly treat with organic solutions if detected.
When is the right time to harvest Jenny Kiwi fruits?
Harvest when the fruit is firm but yields to gentle pressure, typically in late fall.
What is the best way to store Jenny Kiwi fruits after harvesting?
Store ripe fruits in the refrigerator to extend their shelf life and maintain freshness.
How can I enjoy Jenny Kiwi fruits?
Enjoy fresh fruits as a healthy snack, add to salads or smoothies, or use in desserts for a burst of flavor.