

Have you ever wondered if you could grow your own kiwis at home? Picture this: enjoying the sweet, tangy taste of a kiwi fruit you grew yourself. Imagine the satisfaction of nurturing a tiny seed into a flourishing vine laden with delicious fruits.
In this article, you’ll discover the simple yet rewarding process of growing kiwis from seed. You’ll learn the essential steps, from selecting the right seeds to caring for your plants as they mature. By the end, you’ll be equipped with the knowledge and confidence to embark on your kiwi-growing journey.
Get ready to experience the joy of harvesting your very own homegrown kiwis. Let’s dive into the world of kiwi cultivation and unlock the secrets to successfully growing these delectable fruits from seed.
Key Takeaways
- Choose ripe kiwi fruits and carefully extract the seeds for better germination rates.
- Soak the seeds in water to soften the outer coating before planting in a well-draining mix.
- Provide ample sunlight and proper care as seedlings emerge and grow, including vine training and pollination considerations.
- Select fresh, varietal kiwi seeds, consider organic options, and test seed viability for successful cultivation.
- Germinate kiwi seeds by soaking them, creating a humid environment, and transferring sprouted seeds to pots.
- When transplanting seedlings, ensure proper timing, container selection, soil preparation, light and water conditions, and post-transplant care for healthy growth.
Overview of Growing Kiwis from Seed
To successfully grow kiwis from seed, you need to follow a few essential steps. Here’s an overview to help you understand the process better:
Seed Selection:
Choose ripe kiwi fruits and extract the seeds carefully. Rinse the seeds to remove any fruit residue before planting. Ensure you select healthy-looking seeds for better germination rates.
Germination Process:
Start by soaking the seeds in water for a few days to soften the outer coating. Plant the seeds in a well-draining potting mix and keep them in a warm, sunny location. It’s crucial to keep the soil consistently moist during this phase.
Seedling Care:
Once the seeds germinate and seedlings emerge, provide them with ample sunlight. Keep the soil moist but not waterlogged to prevent root rot. Transplant the seedlings into individual containers as they grow.
Vine Training:
As the seedlings grow taller, introduce a trellis or support structure to guide the vines’ growth. Kiwi plants are vigorous climbers, so proper training is vital for their development.
Pollination:
Kiwis are dioecious plants, meaning they have separate male and female plants. To ensure fruit production, you’ll need both genders present. Bees and other pollinators can help with the pollination process.
Fruit Development:
With proper care and favorable conditions, your kiwi vines will start bearing fruit in 3-5 years. Prune the vines as needed to maintain their health and productivity.
Harvesting:
Once the kiwi fruits reach the desired size and firmness, you can harvest them. Twist the fruits gently to detach them from the vines. Enjoy the delicious taste of your homegrown kiwis!
Choosing the Right Kiwi Seeds
For successful kiwi cultivation at home, selecting the right kiwi seeds is crucial. Here’s what you need to consider:
Recommended Products

Multi-Variety Seeds: Contains grape, apple, kiwi, jackfruit, mulberry, and cherry seeds, totaling over 400 seeds
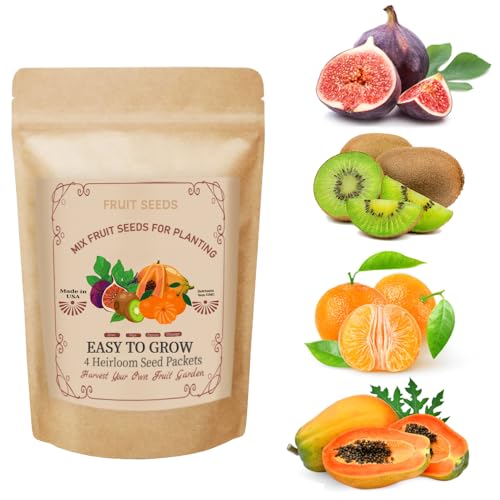
4 most popular fruits Kiwi Seeds (Actinidia Lindl.) Fig Seeds (Ficus carica) Papaya Seeds (Carica papaya) Orange Seeds (Citrus × sinensis) each variety is individually packaged and labeled with a product label for your easy identification

🥝 Kiwi fruit, also known as Chinese gooseberries, are small, oval-shaped fruits with a brown fuzzy skin and bright green flesh. They are native to China, but are now grown in many countries around the world, including New Zealand, where they are a popular export.
Freshness Matters
Start with fresh kiwi seeds. The viability of kiwi seeds decreases over time, so it’s best to source fresh kiwis for seeds. Fresh seeds have a higher germination rate, giving you a better chance of successful growth.
Varietal Selection
Choose seeds from a kiwi fruit that you enjoy eating. There are different kiwi varieties, each with distinct flavors and characteristics. By selecting seeds from a kiwi you like, you’re more likely to be satisfied with the fruit produced by your plant.
Organic Kiwis
Opt for organic kiwis if possible. Organic fruits are less likely to have been treated with chemicals that could affect seed germination. Choosing organic seeds promotes healthier plant growth and a more natural gardening process.
Seed Viability Testing
If you’re unsure about the viability of kiwi seeds you have, consider performing a simple viability test. Place the seeds in a damp paper towel inside a plastic bag. Check for sprouting after a few weeks. Discard seeds that show no signs of germination.
Seed Storage Conditions
Properly store your kiwi seeds. Keep them in a cool, dry place away from direct sunlight. Storing seeds correctly maintains their viability until you’re ready to plant them.
Seed Supplier Reputation
If purchasing kiwi seeds, choose a reputable supplier. This ensures you’re getting quality seeds that are more likely to germinate successfully. Research seed suppliers or buy from trusted sources for the best results.
Choosing the right kiwi seeds sets the foundation for healthy plant growth and a bountiful harvest. Select fresh, varietal seeds, consider organic options, test seed viability, store them properly, and prioritize reputable suppliers for a successful kiwi cultivation journey.
Germinating Kiwi Seeds
To germinate kiwi seeds successfully, follow these straightforward steps:
Recommended Products

Self-Watering System: No more over-watering or under-watering! You won't need to water frequently. The bottom of the seedling tray and capillary mat maintain ideal humidity, preventing over-watering or soil drying out. This promotes healthy root development, saves time and effort, and allows you to enjoy the fun of planting with ease.

12-LED GROW LIGHT PER TRAY — Each of the five seed starting trays features a full-spectrum grow light with 12 LED beads, providing supplemental light for indoor seedlings.
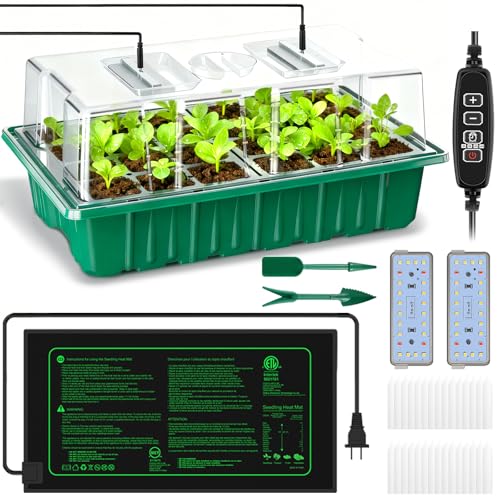
🌱【Most Suitable Temperature】The Durable Seedling Hydroponic Heat Mat provides consistent, uniform heating at temperatures around 70°F to 85°F (24℃ to 30℃), which are the perfect temperatures for seed starting and cutting propagation.High-quality plastic is reusable, recyclable. The seed starter trays are divided into equal 1.96" squares in 1.85" depth for your small or large seeds for flowers, vegetables, fruits, succulents and other plants. It is designed with the proper size holes to allow drainage, while the bottom seedling trays retains overflow water to prevent leaking.
Preparing the Seeds
Start by soaking your kiwi seeds in warm water for about 24 hours. This softens the seed coat and helps kickstart the germination process.
Creating a Germination Environment
Place the soaked seeds in a damp paper towel. This maintains the moisture level essential for germination. Seal the paper towel with the seeds in a plastic bag to create a humid environment.
Providing Optimal Conditions
Keep the seeds in a warm spot, ideally around 70°F (21°C), to promote germination. It’s crucial to ensure a consistent temperature to aid successful seed sprouting.
Monitoring Progress
Check the seeds regularly to observe any signs of germination. You may notice the seeds cracking open and tiny roots emerging. This indicates that germination has begun.
Transferring to Soil
Once the seeds have sprouted, it’s time to transfer them to individual pots filled with well-draining potting mix. This provides the young seedlings with the nutrients they need to grow.
Providing Adequate Care
Place the pots in a sunny location with indirect light. Ensure the soil remains moist but not waterlogged. You’ll soon see your kiwi seedlings grow into healthy plants.
Conclusion
By following these simple steps, you can successfully germinate kiwi seeds and kickstart your kiwi growing journey. Remember to be patient and provide the care and attention necessary for your kiwi plants to thrive.
Transplanting Kiwi Seedlings
Once your kiwi seeds have germinated and grown into healthy seedlings, it’s time to transplant them into individual containers. This step is crucial for the continued growth and development of your kiwi plants.
Transplanting Tips
- Timing: When the seedlings have developed their second set of leaves, they are ready for transplanting.
- Container Selection: Choose containers that are deep enough for the seedling’s root system to grow. Individual pots with drainage holes work well.
- Soil Preparation: Prepare a well-draining potting mix with a blend of peat moss, perlite, and compost.
- Transplantation Process:
- Carefully remove the seedling from its current container, handling the delicate roots gently.
- Make a hole in the new container’s soil, ensuring it’s deep enough to accommodate the roots without bending or crowding.
- Place the seedling in the hole and gently firm the soil around it.
- Water the transplanted seedling thoroughly to help it settle into its new home.
- Light and Water:
- Place the transplanted seedlings in a location with indirect sunlight initially to reduce stress.
- Keep the soil consistently moist but not waterlogged to support healthy growth.
- Temperature and Humidity:
- Maintain a warm and humid environment for the seedlings, as they are still delicate at this stage.
- Fertilization:
- Avoid fertilizing the seedlings immediately after transplanting. Wait until they have adjusted to their new containers.
- Monitoring:
- Keep a close eye on the transplanted seedlings for any signs of stress or wilting. Adjust care as needed.
By following these transplanting guidelines and providing proper post-transplant care, you can ensure the successful growth and development of your kiwi seedlings. Remember, patience and consistent care are key to nurturing thriving kiwi plants from seed.
Kiwi Seedling Care
In the process of growing kiwis from seeds, once your seedlings have reached a certain stage, it’s crucial to provide proper care to ensure their healthy development. Here are essential tips to help you take care of your kiwi seedlings:
Recommended Products

INDOOR GROWING: Growing indoors is easy under the right conditions; Miracle-Gro Houseplant Potting Mix is an indoor plant potting soil that combines key elements container plants need to thrive

Miracle-Gro Indoor Potting Mix for Seed Starting grows stronger roots for seeding success (vs unfed when used as directed)

Package Includes: You will get 4 quarts of coarse perlite, these are evenly sized and perfect for adding to potting soil for potted plants or as pavement for succulents to keep your plants looking nice and clean, it is essential for precise cactus mixes or carnivorous plant soils as it pulls water away efficiently
Transplantation Timing
Transplant your kiwi seedlings into individual containers once they have developed their first set of true leaves. This usually occurs about 4-6 weeks after germination. Transplanting too early can stress the seedlings, while delaying it may hinder their growth.
Container Selection
Choose containers that are deep enough to accommodate the developing root system of the kiwi plant. Opt for pots with drainage holes to prevent waterlogging, promoting adequate aeration and water drainage for healthy growth.
Soil Preparation
Prepare a well-draining potting mix for your kiwi seedlings. Use a blend of peat moss, perlite, and compost to provide a balanced growing medium that retains moisture without becoming waterlogged.
Transplantation Process
Gently remove the seedlings from their current container, being careful not to damage the delicate roots. Plant each seedling in its individual container at the same depth as they were in the original container. Firm the soil gently around the seedlings to provide stability.
Light and Water Requirements
Place your kiwi seedlings in a location with ample sunlight, receiving at least 6-8 hours of sunlight daily. Water the seedlings regularly, keeping the soil consistently moist but not waterlogged. Avoid overwatering, as it can lead to root rot.
Temperature and Humidity Considerations
Maintain a warm environment for your kiwi seedlings, with temperatures around 70-75°F (21-24°C). Ensure a moderate level of humidity around the seedlings by misting the leaves occasionally, especially in dry conditions.
Fertilization Guidelines
Start fertilizing your kiwi seedlings with a balanced, water-soluble fertilizer once they have established themselves in their new containers. Follow the manufacturer’s instructions for dilution and application frequency to avoid over-fertilization.
Post-Transplant Care
Monitor your kiwi seedlings regularly for any signs of stress, such as wilting or yellowing leaves. Adjust watering and light conditions as needed to support the healthy growth of your seedlings.
Harvesting Kiwis from Seed
In the exciting journey of growing kiwis from seed, harvesting the fruits of your labor is a rewarding experience. Here’s a guide on how to harvest kiwis from seed effectively:
Knowing the Right Time to Harvest
When it comes to harvesting kiwis, timing is crucial. Kiwis are ready for harvest when they are fully mature, typically in late fall. You can determine their readiness by gently squeezing the fruit. If it yields to slight pressure, it’s ready to be picked. Kiwis that are still hard need more time to ripen on the vine.
Harvesting Techniques
To harvest kiwis, use sharp scissors or pruning shears to cut the fruit from the vine carefully. Leave a small part of the stem attached to the fruit to help prolong its shelf life. Avoid pulling the fruit off the vine, as this can damage the plant.
Storage Tips
After harvesting, store kiwis at room temperature to allow them to ripen fully. Once ripe, you can refrigerate them to maintain freshness for an extended period. Kiwis can be stored in the refrigerator for up to 2-4 weeks, depending on their ripeness when harvested.
Ripening Kiwis
If your kiwis are not fully ripe when harvested, you can ripen them by placing them in a paper bag with a ripe banana or apple. These fruits release ethylene gas, which speeds up the ripening process. Check your kiwis daily until they reach the desired level of ripeness.
Enjoying Your Harvest
Once your kiwis are ripe and ready to eat, you can enjoy them fresh, add them to fruit salads, or use them in various recipes. Their sweet and tangy flavor makes them a versatile and delicious addition to your culinary creations.
Conclusion
Growing kiwis from seed can be a rewarding experience that allows you to enjoy the fruits of your labor. By following the steps outlined in this guide, you can successfully nurture kiwi plants from seed to harvest. Remember to select quality seeds, provide proper care, and be patient throughout the process. With the right techniques for germination, harvesting, and storage, you can savor the delicious taste of homegrown kiwis. Embrace the journey of cultivating kiwis from seed, and enjoy the satisfaction of watching your plants thrive and produce fruit. Happy gardening!
Frequently Asked Questions
Q: How do I select high-quality kiwi seeds for growing at home?
A: Choose kiwi seeds from a reputable supplier, ensuring they are fresh, viable, and disease-free to promote successful germination and healthy plant growth.
Q: What is the process of germinating kiwi seeds at home?
A: Soak kiwi seeds in water for 24 hours, plant them in a well-draining potting mix, maintain consistent moisture and warmth, and provide indirect sunlight until seeds sprout.
Q: When is the right time to harvest kiwis grown from seed?
A: Harvest kiwis when they reach maturity, typically around 4-5 years after planting, by checking for firmness, color change, and easily detachable from the vine.
Q: What are some techniques for harvesting kiwis at home?
A: Gently twist ripe kiwis from the vine, avoiding pulling or tugging, to prevent damage to the fruit and plant for future growth.
Q: How should harvested kiwis be stored to maintain freshness?
A: Store harvested kiwis at room temperature for ripening, then refrigerate to prolong freshness, ensuring they are not stacked or bruised during storage.
Q: What are some methods to ripen harvested kiwis at home?
A: Place unripe kiwis in a paper bag with a ripe banana or apple to speed up the ripening process naturally due to ethylene gas emissions.
Q: How can I enjoy the harvested kiwis from my home garden?
A: Enjoy freshly harvested kiwis raw, sliced over yogurt or salads, blended in smoothies, or used as a topping for desserts to savor their sweet and tangy flavor.
